
15 Charcoal Grilling Tips for Perfect Kabobs
- Chelo
- Feb 21, 2025
- 7 min read

Grilling kabobs over charcoal can be a delightful culinary art. Each bite is bursting with flavor, but crafting that perfection requires a few insider secrets. Whether you're a seasoned griller or a first-timer, these tips will help you create kabobs that are juicy and perfectly cooked every time. Let's unlock the secrets to charcoal grilling success!

1. Choosing the Right Meat Cuts
For succulent kabobs, the type of meat you choose plays a vital role. Opt for cuts with a bit of fat to enhance flavor and juiciness. A balance between meat and fat delivers a moist and tender bite. Consider using sirloin for beef, as it’s tender and flavorful, or chicken thighs for poultry, where the extra fat content helps maintain moisture. Lean cuts like chicken breast can be used if kept marinated and brushed with oil. Remember, the right cuts can make all the difference in each bite and ensure your kabobs are bursting with flavors.
Selecting the right cut isn't just about flavor; texture matters too. Cuts such as lamb shoulder or beef sirloin are ideal for kabobs as they hold well during grilling. These selections not only offer robust taste profiles but also adapt well to marinades, ensuring they absorb the flavors exquisitely. When preparing kabobs, balance different meat cuts to cater to various preferences. Incorporate a mix like beef sirloin and lamb for diversity. The key is to ensure that the chosen cuts can withstand high heat without drying out, locking in succulent flavors.
2. Marinating for Maximum Flavor
A good marinade sets the stage for flavorful kabobs by infusing meat with spices and herbs. A simple blend of olive oil, lemon juice, garlic, and your choice of spices works wonders. The acidity in the marinade tenderizes the proteins, making them more succulent. Ideally, marinate meats for at least two hours to allow deep penetration of flavors, but don’t hesitate to extend this to overnight marination for a fuller taste. Remember, flavors need time to marry, so plan ahead and let the marinade work its magic for heavenly kabobs.
Marination isn't merely a step; it’s an art. While a basic marinade works well, experimenting with ingredients like soy sauce, honey, and spices can elevate your kabobs to gourmet levels. Using fresh herbs such as rosemary or thyme enhances the aroma and depth. For those seeking a spicy kick, add chili flakes or fresh jalapenos to the mix. Remember, the inclusion of oil not only carries flavors but also ensures the meat does not stick to the grill. Strive for harmony in your flavors and adjust each component to match the protein to ensure a balanced taste profile.
3. Prepping Your Veggies
Vegetables bring color, texture, and nutrition to your kabobs, making preparation key. Opt for firm choices like bell peppers, onions, zucchinis, and cherry tomatoes which can withstand grilling heat. Cut them into consistent sizes to ensure even cooking. Don’t skip marinating the vegetables; a brief soak in olive oil, balsamic vinegar, and herbs enhances their natural flavors. Properly prepped veggies remain crisp and vibrant, offering a healthy, colorful complement to meat. Aim to balance the proportion of meat to veggies for well-rounded, appealing kabobs.
4. Mastering the Art of Skewering
Skewering is a craft that ensures your kabobs cook evenly and look appealing. Use metal skewers to avoid burning, or soak wooden ones in water for at least 30 minutes before grilling. Thread ingredients by alternating between meat and vegetables for a visually diverse presentation. Uniform sizes are critical—cutting items into roughly one-inch cubes helps achieve consistent cooking. Avoid overcrowding the skewer; allow some space for heat to circulate between pieces, ensuring they all cook evenly. This attention to detail is vital for delightful grill marks and a perfect bite.
5. Setting Up Your Charcoal Grill
The foundation of great grilling lies in properly setting up your charcoal grill. Utilize the two-zone fire method—arrange charcoal on one side for high heat and leave the other side cooler for indirect cooking. This setup grants flexibility in managing different cooking requirements, allowing you to sear meats quickly and finish them slowly to perfection. Position your skewers over the direct heat initially to develop those desirable grill marks, then shift them to indirect heat to complete the cooking without burning. Crafting this technique into your routine can significantly elevate your grilling outcomes.
Creating a good smoking component with charcoal setup not only integrates a smoky flavor but also aids cooking. Arranging your coals in a pyramid shape can help them light faster, ensuring uniform heat distribution. Incorporating wood chips in the setup before lighting enhances memory flavor. Distribute the coals evenly using a chimney starter, and make sure to leave a side without coals to control the heat effectively. This balance allows for flexibility, offering hot zones for searing and cooler sections for gentle, thorough cooking. Master the art of charcoal management to revolutionize your grilling experience.
6. Lighting the Charcoal
Proper charcoal lighting is crucial for a consistently warm grill. Using a chimney starter is a great technique as it guarantees even lighting and preserves flavor by avoiding chemical lighter fluids. Stack the charcoal in the chimney with newspaper beneath and ignite from the bottom. In approximately 15 minutes, you’ll achieve glistening coals ready for the grill. Once fully lit, distribute them carefully into your grill for an even heat zone. This method not only simplifies lighting but also lays a solid foundation for the forthcoming grilling session.
7. Controlling the Grill Temperature
Maintaining an ideal grill temperature is a harmonizing act between the coals and airflow. Adjust the vents—opening them increases air circulation and boosts heat, a fundamental aspect of charcoal grilling. To reduce the temperature, close the vents slightly, thus controlling the fire’s intensity. Regular monitoring is essential; keeping a thermometer handy allows you to effectively stabilize the cooking environment. Whether searing or slow-cooking, managing the heat is crucial for consistent results. Master this balancing act to produce deliciously tender kabobs time after time.
8. Knowing When to Flip
Timing is everything when determining the right moment to flip your kabobs. Allow the kabobs to sear thoroughly on each side, which might take three to five minutes, before gently turning them over. This crucial step ensures the juices are sealed in and those crucial grill marks appear, representing the hallmark of skilled grilling. Overflipping prevents the meat from properly caramelizing, which ultimately affects texture and flavor. Aim to flip only once or twice during cooking for evenly cooked and beautifully seared kabobs that will impress every guest.
9. Timing the Grill
Precision timing dramatically affects the turnout of your kabobs. Keeping a diligent watch on the grill prevents overcooking and helps maintain that juicy tenderness in meats. Generally, most kabobs complete their cooking cycle within 10 to 15 minutes, but this can vary depending on the meats and vegetables used. Regular checks and the use of an instant-read thermometer can guide you in achieving perfect doneness. Refer to when poultry reaches 165°F and beef near 145°F for medium rare to guide your judgment. Flavorful kabobs are all about readiness, and timing is your ally.
10. Basting for Extra Flavor
Add depth to your kabobs by basting them during the last stages of grilling. Typically, a simple sauce or even the reserved marinade can serve as a flavorful basting agent. Apply it right before the kabobs finish cooking, ensuring it does not burn. A light honey glaze or balsamic brush can provide a sweet balance to the savory elements, while a buttery herb drizzle heightens the richness. Be gentle in timing and application, as overbasting during the early stages can lead to flare-ups and charred flavors. This final touch elevates the taste and appearance for extraordinary kabobs.
11. Using Wood Chips for Smoky Goodness
Incorporate wood chips to infuse your kabobs with a distinct smoky character. Soak the chips in water for about 30 minutes before placing them on the coals. This process releases aromatic smoke as the chips smolder, permeating the meat and veggies with that sought-after barbecue essence. Popular choices include hickory or mesquite for robust tastes, while applewood lends a subtle sweetness. Tailor your selection to the meats you’re grilling. Wood chips transform ordinary grilling into a gourmet experience, delivering layers of flavor with each mouthwatering bite.
12. Creating Grilled Marks
Achieving those coveted grill marks takes more than just timing; placement and patience are key. Position your kabobs across the grill’s hottest zones initially without disturbing them. This technique allows the proteins to develop a caramelized crust that translates into flavorful grill marks. Move them slightly at a diagonal angle after a few minutes to imprint perfect cross-hatch patterns. This simple shift impresses visually and contributes to the delightful texture. Beyond aesthetics, the grilling marks enhance flavor by providing a slightly charred contrast that enhances the kabobs’ taste.
13. Allowing the Meat to Rest
Resting kabobs post-grill is a measure not to be skipped. Allowing the meat to rest for at least 5 minutes ensures juices are reabsorbed, resulting in maximum tenderness and flavor retention. As the proteins relax, juices redistribute throughout, providing a consistent texture and preventing dryness. Cover the kabobs loosely with foil during this period to maintain warmth without trapping moisture, which can dampen the delightfully crisp grill crust. Embrace resting as a vital part of the grilling process to deliver impeccably tender, flavorful kabobs that captivate with every bite.
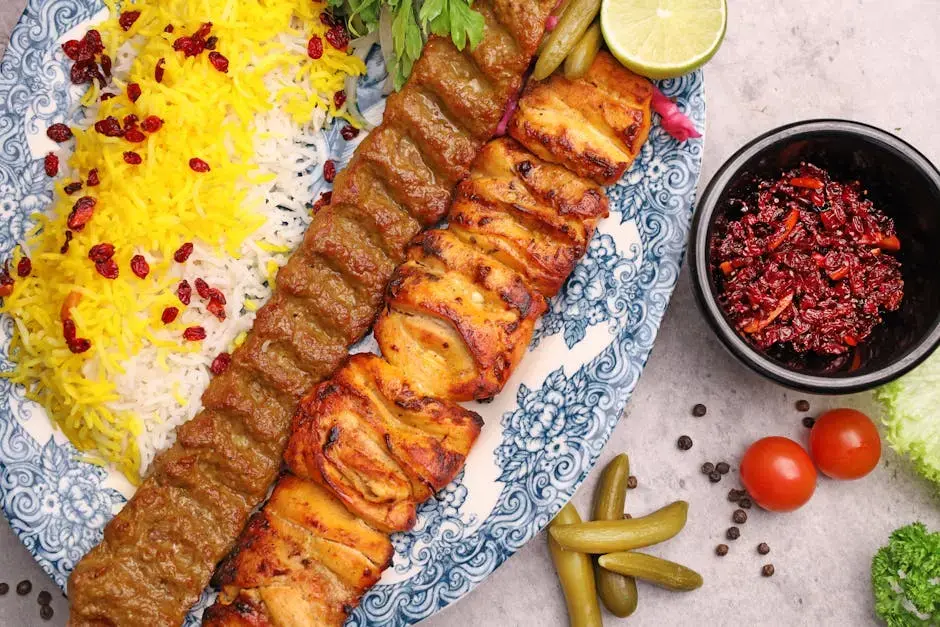
14. Serving with Style
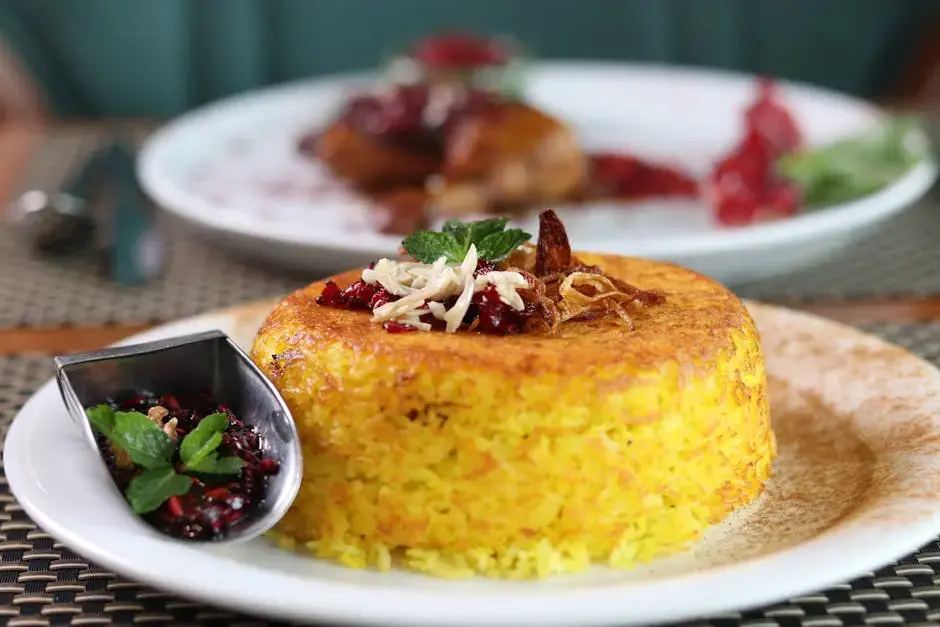
Presentation adds the final touch to your kabob masterpiece. Arrange your kabobs on a vibrant platter and garnish with fresh herbs like parsley or cilantro to introduce a pop of color. Encourage creativity by pairing them with captivating sides such as tangy yogurt dips, fresh tabbouleh, or fluffy saffron rice. The visual appeal complements the flavors, enhancing the dining experience. Paying attention to presentation doesn't just elevate the meal's aesthetic; it sets the tone for tasting and appreciation. Surprise your guests with an artfully plated serving, making your kabobs the centerpiece of any gathering.
15. Cleaning the Grill After Cooking
Post-grilling maintenance is less of a chore and more of an investment in future meals. Clean your grill promptly after cooking while it's still warm, which makes the process significantly easier. Use a grill brush to remove food residue and a cloth or sponge soaked in soapy water to tackle stubborn spots. Regular maintenance not only prolongs the grill’s life but enhances dish quality by providing a fresh grilling surface every time. Introduce this step as a ritual to conclude your grilling endeavors, ensuring your setup is ever-ready to deliver delicious, perfectly cooked meals.

Comments